Wednesday 24 December 2014

Reindeer Doughnuts

Reindeer Doughnuts
The girls made some special Christmas Treats today. We made Nerdy Nummies Reindeer Doughnuts. These are so easy to make, the girls made them on their own.


What you need:
  • Chocolate covered mini doughnuts
  • Red smarties or m&ms - we used some brown ones too for the non-Rudolph reindeer.
  • Pretzels
  • White pearl sprinkles - I got Cake Angels Tuxedo sprinkles from Tesco and separated the white and black pearls.

Method
  • Break the pretzels into stick shapes for the antlers and push them into the doughnuts
  • Press the red smartie into the doughnut hole
  • Press the pearl sprinkles where the eyes should be, and you're done!


Rebecca's Teddy Bear Doughnut
Om, Nom, Nom!


Friday 19 December 2014

Oh Christmas Tree

Oh Christmas Tree
Over the past few years I've experimented with making baked gifts for people. It started when I was pregnant with Elizabeth and trying to save a bit of money, so I made Scottish Tablet and Macaroons for Jeff's family. And more recently it's been making gifts for the girl's teachers and childminder.

Last year I made gingerbread Christmas trees for Elizabeth's teachers. I decided to go one step further this year, and make 3D edible Christmas trees.

Gingerbread Ingredients - I got this recipe from the cookbook that came with my Andrew James food mixer

  • 1 medium egg
  • 305g plain flour
  • 1tsp bicarb of soda
  • 3tsp ground ginger
  • 115g soft butter
  • 175g soft brown sugar
  • 4tbsp golden syrup

Method

  • Preheat the oven to 165 (fan)
  • Break the egg into a cup and lightly whisk it
  • Add flour, bicarb, ginger to a bowl. Add the butter and mix it until it looks like breadcrumbs.
  • Add the sugar and mix.
  • Add the egg and syrup and mix. The recipe says to mix it until it becomes a soft dough, but I find it works better doing this part by hand.
  • Turn the dough out onto a lightly floured surface and roll it out to a thickness of about 5mm. Cut out the shapes you need. I made my own template for the Christmas Trees.


  • Lift onto a lightly oiled/greased baking sheet. I use a silicon sheet and I don't need to grease it, they come off really easily.
  • Bake for about 12-15 minutes until pale golden brown.
  • Leave them to cool for a minute or two on the baking sheet. Then transfer onto a wire rack to cool completely. When cold, decorate as you like.


    • I had to do a bit of trimming because the mixture spread a little in the oven. When I did this when they were fresh, it was difficult to do, because they were crunchy and some parts just snapped off. When I completed the job the next day it was much easier as the biscuits had softened a little.


  • The 3D trees were covered in green icing and I added small colourful sprinkles to look like Christmas lights. I then "potted" them in a chocolate cupcake and covered the cake in white chocolate buttercream icing.

Chocolate cupcakes ingredients - Cupcakes from the Primrose Bakery

  • 115g dark chocolate (70% cocoa or more)
  • 85g unsalted butter, at room temp
  • 175g soft brown sugar
  • 2 large eggs separated
  • 185g plain flour
  • 3/4 tsp baking powder
  • 3/4 tsp bicarb of soda
  • Pinch of salt
  • 250ml semi skimmed milk
  • 1 tsp vanilla extract

Method

  • Preheat the oven to 170 (fan) and line a muffin tray with cupcake cases
  • Melt the chocolate - I do it in the microwave, 30 seconds at a time and stirring between. Leave it to cool slightly.
  • In a large bowl cream the butter and sugar until the mixture is pale and smooth (a few minutes with an electric mixer).
  • In a separate bowl beat the egg yolks until they are paler in colour and creamy. Add the eggs to the large bow and mix. Then add the melted chocolate and mix.
  • Combine the flour, bicarb, baking powder and salt in a separate bowl.
  • Put the milk in a jug and add the vanilla extract.
  • Add one third of the flour to the chocolate mixture, mix. Pour in one third of the milk mixture and mix. Repeat these steps until all the flour and milk have been added.
  • In a clean bowl whisk the egg whites until soft peaks start to form.
  • Carefully fold the egg whites into the batter using a metal spoon.
  • Spoon the mixture into the cupcake cases, filling them to about two thirds full.
  • Bake for about 20-25 minutes.
  • To check they are cooked, insert  a skewer into the centre of one of the cakes - it should come out clean.
  • Remove from the oven. Leave to cool in the tin for about 10 minutes. Then remove and place on a wire rack to cool.

White Chocolate Buttercream icing ingredients

  • 55g unsalted butter at room temp
  • 30ml semi-skimmed milk at room temp
  • 1/2 tsp canilla extract
  • 250g icing sugar
  • 100g white chocolate melted
  • 3tbsp double cream

Method

  • In a large mixing bowl, beat the butter, milk, vanilla and half of the icing sugar until smooth.
  • Gradually aff the remainder of the icing sugar and beat until smooth and creamy.
  • Add the cooled melted chocolate and cream to the buttercream mixture and beat until again smooth and creamy.


For the finishing touches I put the Christmas trees into small potting pots that I bought off amazon.

Friday 12 December 2014

Lasagne


Bolognese Sauce

  • 250 g lean steak mince
  • 1 tin of chopped tomatoes
  • 1 medium sized onion chopped
  • 1 carrot
  • 1 stick of celery
  • 2 tbsp tomato puree
  • 250 mls beef stock
  • A few sprigs of thyme
  • A bay leaf
  • Olive oil (although I sometimes use sunflower oil and sometimes marg)
  • 120 ml Red wine (optional - in my case depending on whether I have some in the house)
  • Salt and Pepper
  • Plus any other veg that's needing used up

Method:

  • Fry the onions in oil until soft
  • Add the mince, fry until it has browned
  • Add the tomato puree, give it a good mix
  • Add the tinned tomatoes and stock and mix
  • Add the rest of the vegetables, herbs and seasoning
  • Bring to the boil, then cover it and put it on the lowest heat to simmer for as long as possible! Probably at least an hour. I often let it thicken up with the lid off towards the end of cooking. But that's a judgement call.

I make a cheese sauce for my lasagne. This sauce is great for macaroni cheese.

Cheese Sauce

  • A knob of margarine (about 30/40g)
  • 2 heaped tsp plain flour
  • 70-100 g of your favourite cheddar grated - we like Red Leicester
  • About 120-150 ml milk

Method

  • Melt the marg in a small pot
  • Add the flour and mix until it all comes together
  • Add a small dash of milk and mix it until all the liquid has been absorbed. Repeat this until you have a runny liquid, probably double cream consistency.
  • Add the cheese and heat it up until the cheese has all melted and the mixture has thickened.

Next up is constructing your lasagne. I use a small casserole dish. You will need lasagne pasta obviously. But also I sometimes add a layer of pepperoni or chorizo if I have some in the fridge. It spices it up a little.

  • Put a layer of mince, then lasagne, then cheese sauce, mince, pepperoni/chorizo, lasagne, cheese sauce etc until the mixture is all used up. With the cheese sauce on top.
  • Cook it in the oven at about 160 (fan) for 40-45 minutes.

I usually serve it up with dough balls. But crusty bread is also good.

Friday 5 December 2014

Easy Cheesy Bread Rolls

Easy Cheesy Bread Rolls
Attempt 1
I made these rolls according to the recipe in Annabel Karmel's My Favourite Recipes.

Ingredients

  • 1x7g sachet of fast action yeast
  • 1tsp sugar
  • 150ml hand-hot water
  • 60g mature Cheddar cheese grated
  • 30g Parmesan cheese grated
  • 225g white bread flour
  • 1/4 tsp salt
  • 1tbsp sunflour oil
  • 1 egg, beaten for greasing
  • Seeds for sprinkling (I used sesame and poppy seeds)

Method
  1. Mix yeast, sugar and 3tbsp water in a bowl. Stir to dissolve the yeast. Leave it to stand for 5 minutes or until frothy.
  2. Stir together flour and salt in a large bowl. Make a well in the middle and add the oil, yeast mixture and water.
  3. Mix into a soft dough. Add more water if it is too dry.
  4. Turn onto a floured surface and knead until smooth - about 10 minutes.
  5. Pat the dough into a circle about 20cm (8in) across. Spread the cheese over it then fold the dough in half, then in half again so that the cheese is enclosed. Knead for 1-2 minutes.
  6. Divide into about 8 pieces. Shape them into balls and place on an oiled baking sheet.
  7. Leave to rise for about 45 minutes or until doubled in size.
  8. Preheat the oven to 200 degrees (180 fan). Brush with egg. Sprinkle with seeds. Bake for about 12-15 minutes.
This is a really good recipe to do with the children. My two especially loved kneading the dough, spreading the cheese onto the dough and making the dough balls. They made tiny ones, so I had to watch my time so they didn't over cook.
Jeff preferred these rolls to attempt 2.

Attempt 2 - Even easier cheesy bread rolls

I decided to try to make cheesy bread rolls using the Bridge Rolls recipe that I wrote about earlier in the year.
I followed the recipe as usual to make the dough. Once the dough was finished in the bread machine, I turned it out and split it in half. I used half of the dough to make normal rolls, and I used the other half to make cheesy rolls, following the method above from point 5 onwards.
I prefer the rolls done this way. They were easier to make and lighter to eat and the cheese taste was more subtle.
The girls still got to do knead the cheese into the dough and make the balls etc. So they were happy! And they each got cheesy rolls in their packed lunches.

Friday 28 November 2014

Colourful Chicken Risotto

I have said previously said that my girls are fussy eaters. Technically Elizabeth is the fussy one and Rebecca copies. However, Rebecca is usually more willing to try new things, especially when Elizabeth is not around. So my new cooking challenge is to introduce new food to Rebecca at lunchtimes during the week when Elizabeth is at school.

Today I tried Colourful Chicken Risotto from The Baby-Led Weaning Cookbook by Gill Rapley & Tracey Murkett.

I have never tried risotto, it's not a dish that appeals to me, but as Rebecca is such a great fan of rice I thought I would give it a go. How hard could it be... (nicknamed the "Death Dish" on Australian Masterchef)?

The recipe is as follows:

1tbsp olive oil
25-50g butter
1 small onion chopped or sliced
200-300g chicken diced (I used one chicken breast)
750ml chicken stock
1 small red pepper sliced
1 small courgette sliced
1 handful of sweetcorn tinned or frozen
250g risotto rice
2tbsp Parmesan cheese grated
Pepper for seasoning

Method:
Heat the oil and butter in a large pan. When the butter is melted, add the onion and fry until soft. Add the chicken, fry until it is sealed.
Put the stock on in separate pan (a small one will do).
Add the peppers & courgettes to the chicken, fry for about 3-4 minutes until they are beginning to soften. Add the sweetcorn. Add the rice, mix it in until it is all coated with the butter/oil mixture.
Add the stock one ladleful at a time. Mix until the liquid is absorbed. Then add the next ladleful and mix until it is absorbed into the rice. Repeat this until the rice is plump but still has a bite and the overall consistency in the pan is creamy (this took me about 30 minutes).
Take the pan off the heat, stir in the Parmesan cheese and black pepper.


The overall result was ok. I'm fairly sure I cooked it correctly. It was creamy and silky, but not really to my taste or Rebecca's. I did enjoy the veg and chicken though but I think I'll stick to long grain and basmati rice.

I give this meal 4/10.

Friday 21 November 2014

Birthday Cakes

Cakes, Cakes, Cakes
I've been challenging myself to be creative when it comes to birthday cakes.
I've made some progress as you can see.

Elizabeth's 2nd birthday January 2012
Vanilla Layer Cake from Cupcakes from the Primrose Bakery

Elizabeth's 3rd Birthday Cake, January 2013
Chocolate Layer Cake from the Primrose Bakery

My birthday, May 2013
same as above

Rebecca's 2nd Birthday, November 2013
This is Lorraine Pascale's "I can't believe you made that cake" from Baking Made Easy. It's a great cake, really yummy and looks fab. Elizabeth insisted I make it for her next birthday too. I now constantly see variations of it on the internet.
What I learned from Elizabeth's cake Jan 13, was to leave the smarties until serving. If you put them on the cake too far in advance the shells lose their crispiness.

My birthday, May 2014
Red Velvet Cake from Lorraine Pascale's Baking Made Easy. I think I made the medium cake. I did NOT use enough red colouring, so it was really just a chocolate cake.
This was my first attempt at using Fondant Icing. I got the ready to roll stuff! I didn't make the flowers.


Jeff's Birthday, October 2014
And, of course there's the Candy Cake I made for Jeff's birthday last month. It's funny because since then it seems that "surprise cakes" are the in-thing! I got my idea from a conversation with Elizabeth about pinatas, and thought it would be cool to combine the cake with Jeff's love of sweets.

Rebecca's 3rd Birthday, November 2014
Finally, last week's Mystery Machine Cake that I made for Rebecca's birthday.

I think I've made some progress!


Friday 14 November 2014

Scooby Doo Mystery Machine

Scooby Doo Mystery Machine Cake

This year the girls have both really been into Scooby Doo. So when thinking about Rebecca's birthday cake, I came up with the idea of making a Mystery Machine cake. It seemed like the easiest Scooby Doo design to make.

I had pictures of the van which I drew and used to cut out templates for the decorations on the side of the cake.

I used two loaf tins to bake the cake, using the same sponge recipe as I used for the Candy Cake.
While that was baking and cooling, I started cutting out the designs for the sides of the cake using my templates and ready rolled and coloured fondant icing.


I sandwiched the cakes together with buttercream and covered all the cake with buttercream. Again I used the recipe used to make the Candy Cake.
I then covered the cake with a blue fondant icing, and used water and a pastry brush to add on all of the decorations.

It wasn't as neat as I would have liked, but I was pleased with the final results. More importantly, Rebecca loved it!

A couple of points that I had issues with.
* I don't know how to smooth down the sides of fondant icing. When you put it over the cake, there are always flaps and they end up making the cake look messy. I will research this more next time.
* Next time I will make the designs to stick onto the cake after the cake had it's main layer of fondant icing on it and add them as soon as they are ready. Because I made them in advance they were hard and some of them broke when I picked them up.

Friday 7 November 2014

Krakow with Children

My children are fussy eaters. That's why most of my updates are sweet treats. It's hard to spend time creating something delicious for them to eat when you know at the end of it you're probably going to have to make beans on toast because they haven't touched it!

Anyway, we visited Krakow in Poland at the end of October, and it was a challenge to find somewhere to eat that wasn't McDonalds. In my opinion, the best place we ate was at a little Milk Bar. These are the Polish versions of a cafeteria, but they were just like nice cafes open late. We ordered omelette, scrambled egg, paninis, chips, toast and rice. So there was a nice selection of food to eat and the girls were happy with it. The history of the Milk Bars is fascinating. They were originally set up after the war by the Communists to encourage workers to drink milk instead of moonshine, especially given the large surplus of dairy products in Poland at the time. When times were really hard, the cutlery was often chained to the tables so people wouldn't make off with them!

I think if the girls are still fussy the next time we visit Poland, we will have to try more of these Milk Bars!

Recommendations for some things to do with children in Krakow:


The Castle in Niepolomice. We stayed in the hotel in this castle for the first half of our trip. It was exciting for the girls that we stayed in a real castle. They enjoyed the visit around the museum, especially the stuffed scary animals. The restaurant here was lovely. We had high quality food for very little money, compared to what it would have cost in the UK. And they had kids meals, so the girls had chicken nuggets and chips for tea. Whereas we had things like chicken wrapped in parma ham with mustard puree and steak with potato puree and beetroot cooked in red wine. For pudding, the pistachio creme brulee with chocolate sauce. Unfortunately the girl's ice cream had too much cream, too much strange fruit (we struggled to identify all the fruit) and not enough ice cream for them. It looked amazing though, but it was not a children's dessert.


The Wawel Dragon. We walked up Wawel Hill and saw the stunning Castle and Cathedral. The views from the top of the hill were spectacular. After taking some photos, when we walked down the spiral staircase into the dragons cave. We came out of the cave to where this statue of the famous Dragon stands and breathes fire!


Krakow Old Town. One evening we walked past a little girl who said to her mum "Why do we just come here every day!" Elizabeth said to us "I don't know why she doesn't like it, we get food and toys every time we come here!" One of the highlights, and another Foodie link, in the Old Town for the girls was the sweetie shop, where they made sweeties in front of you! Cukier Artist
Under the town square is the Rynek Underground Museum which is child friendly. It very hi-tech with holograms and touch screens. It documents the history of the town.
The town came alive in the evenings with street performers, horse and cart rides and cafes with outside seating areas. It was very European. 

I would like to go back to Krakow when it's a bit warmer to appreciate being outside. And when the girls are a little bit older and don't need to be carried on our shoulders when their "legs are tired".


Friday 31 October 2014

Quick and Easy Cupcakes

A quick and easy cupcake recipe. It's the sort of thing I always have the ingredients for if the girls want to do baking. This one was passed on to me, but I believe that it is Nigella's recipe:


Cake ingredients

  • 125g unsalted butter
  • 125g caster sugar
  • 2 eggs
  • 125g SR flour
  • 1/2 tsp vanilla extract
  • 2-3 tbsp milk


Method

  • Preheat oven to 180 degrees (fan).
  • Blitz all the ingredients until smooth, except the milk, with electric mixer or in a food processor.
  • Add milk slowly until the mixture is a soft droopy consistency.
  • Spoon into cupcake cases until they are a third full.
  • Cook till risen, golden, bouncy and if you put a skewer in it comes out clean. (about 15 minutes)


Butter cream icing

  • 150g icing sugar
  • 75g creamed butter
  • A little vanilla extract
  • A little milk if it's too firm


Method

  • Blitz all ingredients together with your food mixer until it's smooth.
  • Add colouring if you like.
  • Spread over your cakes.
  • Add toppings etc.

Friday 24 October 2014

Fudge Slices - Traybake

When I was about 17 my after school job was looking after two early teenage girls. I would go to their house everyday after school until either their mum or step dad got home.

My little sister, Janis would also come to their house so that I could look after her too when my mum was working.

On Wednesdays we had half days at school, finishing before lunch. I got into the habit of buying Janis and I some lunch from a deli that was up the road from my school. We would have a roll each and a fudge slice. Their fudge slices were lovely. I don't think I had ever had them before and I don't really remember seeing them since until I was working in a school in Aberdeenshire.

At Mintlaw Academy, Aberdeenshire, the Business Studies classes would have to come up with an Enterprise Initiative every year. One year they came up with the idea of creating and publishing a recipe book. They invited all the members of staff to contribute a favourite recipe or two. I was very much into savoury cooking then, and  I added a Chinese recipe that I loved.

What was great about the book was that the recipes were tried and tested by home cooks. A lot of the recipes were family favourites, probably passed down from previous generations. Included amongst them was a recipe for fudge slices.

It had probably been 15 years since I had a fudge slice from the Deli in Currie, just up the road from the High School. But I thought these ones were a pretty good likeness. Regardless of whether or not they were the same, they were bloody delicious!

I've made this recipe A LOT, my mum now makes it and I've passed it on to Janis and my sister in law. I don't know anyone who doesn't like these. Elizabeth and Rebecca got one in her their lunches this week, and Jeff took some in to his work for his birthday.


I've made my own tweaks to get them just right.

Ingredients

  • 4oz soft margarine
  • 2tbsp sugar
  • 2tbsp golden syrup
  • 1 small tin of condensed milk
  • 9oz biscuits blitzed in the food processor
  • 1 pack of milk chocolate, melted to spread on top


Method

  • Melt the marg, sugar, golden syrup and condensed milk in a pan over a low heat.
  • Bring it to a gentle boil.
  • Let it boil for at least 5 minutes, until the colour has darkened to a caramel colour.
  • Take it off the heat and beat it with the electric beaters until it has thickened - when it's coming away from the sides of the pan. This will probably take about 5 minutes.
  • Add in the biscuits and mix well. The mixture should all come together like a dough.
  • Press and spread the mixture into a baking tray. I use a 30cm/20cm deep tray. I also line it in advance with clingfilm so that the edges are nice and smooth and it's easy to lift out of the tray to chop up when it's set.
  • Spread the melted chocolate evenly over the top.
  • Put it in the fridge to set.
  • Cut it into squares or rectangles, whatever takes your fancy. Small might be best because they are very morish!

Friday 17 October 2014

Candy Cake

I started thinking about having a Pinata type cake for Jeff's birthday after a conversation with Elizabeth about what Pinatas were. When I looked on the internet at other cakes like this, most seemed to cook the cakes in normal cake tins and hollow out the middle. I thought they often looked a bit messy once you cut into them.

On a recent shopping trip Jeff pointed out a cake tin where bakes the cake with a hollowed out shape of a heart in the middle to fill with mouse or ice cream or a different cake. He had seen it being used on Nerdy Nummies. I thought this would do the trick. So I ordered this one from amazon.


I also googled some images of cakes to get ideas for decorating the outside of the cake. I liked the idea of having sweeties on the outside but I didn't want it to be over the top, or too like the "I can't believe you made that cake".

And this is what I ended up with:


I had to redo my cake because there was not enough cake mixture to rise above the shape of the heart inside. And second time round I ran out of eggs, so I have a mixture of large and medium eggs. But the cake was really fluffy and moist that I might do the same next time!

Cake Ingredients:
  • 375g soft unsalted butter
  • 375g caster sugar
  • 3 large eggs, 3 medium eggs, one egg yolk (6 large eggs will probably do)
  • 375g SR flour
  • 2 tsp of baking powder
  • 1tsp vanilla extract
  • 3/4 tbsp milk
Method:
  • Preheat oven to 160 degrees
  • Grease the two baking trays
  • Mix all the ingredients except the milk together in the food mixer. I mixed them for about 5 minutes until the mixture was fluffy and airy. Then I slowly added milk until the mixture was a soft drooping consistency.
  • Add the mixture to the tins so that they cover the shape of the heart.
  • Cook till it golden and the sponge springs back when touched. About 25-30 minutes.
  • Leave them in the tins for a few minutes before popping them out of the tins and placing on a cooling wire.
When they cooled down I added sweets to the bottom layer of the cake. I used Haribo Starmix and some Tesco Jelly Beans. They had to be raised above the level of the cake because of the top half of the heart. I did not add enough. I felt that I could have tried to put a lot more in.


I would have liked there to have been more of a spilling out effect when the cake was cut. There probably would have been had there just been the jelly beans inside. Or if I had gone with smarties or skittles or something.


When served it didn't look very elegant because of the hole. But the taste made up for that.

Then I glazed the cake with some runny apricot jam, because I know that can be good for keeping the cake from crumbling when you add the icing.

Vanilla Buttercream Icing Ingredients (from Cupcakes from the Primrose Bakery)
  • 110g soft butter
  • 60ml semi-skimmed milk
  • 1tsp vanilla extract
  • 500g icing sugar
Method
  • Mix butter, milk, vanilla extract and half the icing sugar together until the mixture is smooth. Then gradually add in the rest of the icing sugar.
I spread half the buttercream icing onto the cake. Then put it in the fridge for about 20 minutes.
Then I spread the other half on.
I pressed skittles around the outside and put lolly pops on the top. Of course the lolly pops sang into the hollow of the heart, so more sweets inside would probably have given them more resistance then they could have stood up a little higher. But overall I was very pleased with the result. So was Jeff. And the girls actually went "wow" when they saw it.


Friday 10 October 2014

Food from the Magic Faraway Tree, Toffee Shocks

I've been trying to think of new ideas for the blog. And one idea was to do something with a book theme.

I read The Faraway Tree books (Enid Blyton) to the girls (well, mainly Elizabeth) a while back and they went down well. I think the repetitive nature of the books is great for younger children, it almost feels like a book of short stories, one for each land at the top of the tree! Elizabeth got to know the characters really quickly even if she didn't always remember what had happened last time in the story.

So I'm going to try to reproduce some of the food that is described in the books.

Elizabeth picked the Toffee Shocks to do first.

"Jo... munched a peculiar piece of toffee which seemed to get bigger in his mouth instead of smaller... Jo's toffee was now so big that he couldn't say a word. Then it suddenly exploded in his mouth, went to nothing, and left him feeling most astonished."

Well, as far as I know it's not possible to make toffees that get bigger and then explode into nothing, but I did decide to experiment with toffee and popping candy.

I followed this recipe for making the toffee. To be honest, it covers Bessie's homemade toffee description. It is the "best, sweetest, chewiest toffee" on it's own.

The problem with popping candy is that it's not so effective once it's been exposed to humidity and moisture. So I tried a few things.
  • a corner of popping candy at the bottom of the baking tray, so the toffee covered it
  • pressing the popping candy on the top of the set toffee
  • squishing some toffee flat then putting the popping candy on top, and rolling it up so that the candy is in the middle of the toffee
The last method seemed to be the best one. Although the candy doesn't pop as well as it would, I think that it gives a degree of *shock* to the toffees. Plus it wasn't an unpleasant texture in the toffee and it added a variety of flavour to the toffees.


My first attempt at making a 3D tree. This is something I will develop for the girls to do themselves, with a template. Next time I will use cardboard instead of paper!


The toffee shocks were the ones wrapped in baking paper. The unwrapped ones are the *Bessie* versions mentioned above.

Coming soon, Pop Biscuits and Google Buns.

I would love some comments, suggestions or ideas. Or just say hello to let me know you've been reading.

Friday 3 October 2014

Minnie's Empire

Elizabeth suggested making some Minnie Mouse biscuits to take to the childminder's house for their snack.


I made them the same way as I made the Strawberry Empires, using melted chocolate for the ears and face.

I have some black fondant icing and I know they would have looked better if I had used that instead of the chocolate, but I want the biscuits to taste nice, and I think too much fondant icing is just too sweet. Plus I know chocolate and plain icing go really well with this biscuit.

Friday 26 September 2014

Froggy Dip

A simple lunch idea inspired by a recipe in Annabel Karmel's My Favourite Recipes.

I'm always on the lookout for new meals to try with the girls. I assembled this creation for their lunch and half expected to be eating it all myself, but they loved it!

Of course you could substitute any of the items from the salad for your own preference, but here's what I used:

  • carrots
  • cucumber
  • red pepper
  • toasted pitta bread
  • mini bread sticks
  • houmous dip, with cucumbers and sliced green olives for the face. I've also done this with cream cheese to dip into. Annabel's recipe uses avocado dip.


Friday 19 September 2014

Battle of the Bangers

It's that time of year again, the Norfolk Food and Drink Festival is in full flow and with it comes the Battle of the Bangers.

This is the third time we have gone to the Battle of the Bangers. It's held at The Forum in Norwich it's completely free and you get to taste some of the best sausages Norfolk has to offer.

It's held in a fenced off area off to the side of the Forum. You are greeted by some very friendly volunteers who give you a voting card and stickers for the children. Elizabeth even got her own voting card this year. Then you can wander around the stalls tasting as many sausages as you like. Just as long as you vote for your favourite at the end.

There were 6 butchers competing this year, you can find out more about them here.

Elizabeth (and Rebecca) voted for The Beefsmith sausages. Jeff and I voted for Icarus Hines sausages. The Beefsmith sausages were, as the title suggests, beef. I much prefer pork sausages, although these ones were nice. Icarus Hines had a few different sausages to sample which was good. Jeff would have liked to have tried their marmite sausages, but they didn't have any on the day.

We always buy some sausages from the event. Icarus Hines didn't have any for sale, but they did have some vouchers for money off buying them at their shop. We bought some Beefsmith sausages seeing as the girls liked them.

Other than the Battle of the Bangers, there were also various food stalls, a tractor for children to sit in and some farm animals to look at so you could get the full before/after experience of your sausages...

A great day out.


This was Rebecca at Battle of the Bangers 2013


And 2014, before tasting....

... and after


Elizabeth enjoyed it too.


Friday 12 September 2014

Do you want to build a snowman?

Another creation inspired by Nerdy Nummies. This time it's Olaf Ice Creams from the movie Frozen.

Elizabeth was desperate for me to try this creation. I took a look at the video and thought it looked do-able.

What you need:

  • A suitable glass
  • Ice cream
  • Milk or plain chocolate (depending on preference really, I used milk), melted and in a piping bag
  • Empire Biscuits (75g butter, 25g sugar, 100g SR flour) shaped into Olaf heads - I found a picture online to make a template to cut around
  • Plain white icing for the top of the biscuit
  • Orange jelly tots cut in half for the nose
  • Matchsticks for the arms. I got the mini matchsticks, which were a perfect size.
Method:
I made a few biscuit heads - in case any didn't work out. Coat the top of the biscuit in white icing, add the half orange jelly tot for Olaf's nose. Once the icing is set, use your melted chocolate in a piping bag to draw the rest of the features. Meanwhile the girls got busy with cookie cutters making and decoraging their own biscuits (and eating the decorations).


To make the snowman, first pipe 3 circles of chocolate inside the glass to make the buttons and let them set.

Add your ice cream, matchsticks and lastly the biscuits and voila!


Friday 5 September 2014

Mini Burger

Rebecca loves burgers. She loves that Shaggy and Scooby Doo loves burgers too! So I decided to try making some at home.

I based my burger on an Annabel Karmel recipe from My Favourite Recipes. But my husband is not fond of onions, so I skipped that step.

Ingredients:

  • 250g lean mince beef
  • 40g fresh breadcrumbs (2 slices of bread)
  • 1 egg yolk
  • 2 tbsp milk
  • 1 tbsp soy sauce
  • about 1 tbsp of fresh oregano chopped
  • salt & pepper
Method:
  • Put it all in a bowl and mix together with your hands. 
  • Divide the mixture into 12 small balls. Flatten them slightly. Cover and chill in the fridge.
  • For cooking, I put them in the George Forman grill for a few minutes until cooked through.

The recipe for the rolls comes from an absolutely brilliant bread machine recipe book by Annette Yates called Fresh Bread in the Morning. I use the Bridge Roll recipe, but I make them into round rolls instead.

Ingredients:
  • 1 egg
  • Semi skimmed milk
  • 1 tsp yeast
  • 1 tsp salt
  • 1 tbsp golden caster sugar
  • 500 g strong white flour
  • 40 g butter, cut into small cubes
Method:
  • Break the egg into a jug and beat it slightly. Make the mixture up to 300 ml by adding the milk.
  • Add the dry ingredients to your bread machine, followed by the butter, then the egg/milk mixture. Set your bread machine to the appropriate basic dough setting. On my machine the programme lasts 2 hours 20 minutes.
  • Preheat oven to 180 degrees (fan)
  • When the programme is finished, turn the dough out onto a lightly floured surface. Knead it lightly to knock out the air.
  • Cut the dough into 24 pieces. Shape into balls. Arrange on the baking try quite close together.
  • Cover and leave it to rise (30 minutes or so).
  • Put in the oven and cook for about 12 minutes, until golden brown and cooked through.
  • Transfer to a wire rack and leave to cool.

These are really tasty burgers and the rolls are good with everything! The roll in the picture was glazed with an egg, which is suggested in the recipe book. However, I forgot to glaze them one time and found that they were just as nice without the glaze, so I save using up an egg and do without now.
Obviously the chips and sweetcorn are just a serving suggestion... but burgers without chips? Come on!

Friday 29 August 2014

Smooth-Slushy

I found a great way to use up bananas that are starting to turn. At this time of year they just don't last very long. As soon as they start to brown take the skin off and put them in the freezer. Use the frozen bananas to make smoothies. They come out like slushies. Lovely on a really hot day.

My staple smoothies is made up of:
  • apple juice
  • the juice of one orange
  • a whole banana
  • a handful of frozen berries - usually raspberries or summer berries
Blend all the ingredients together. Taste and add more ingredients if desired. I sometimes add yoghurt.

The girls help by squishing the orange, breaking up the banana and adding berries until I say STOP!


Friday 22 August 2014

Strawberry Empires

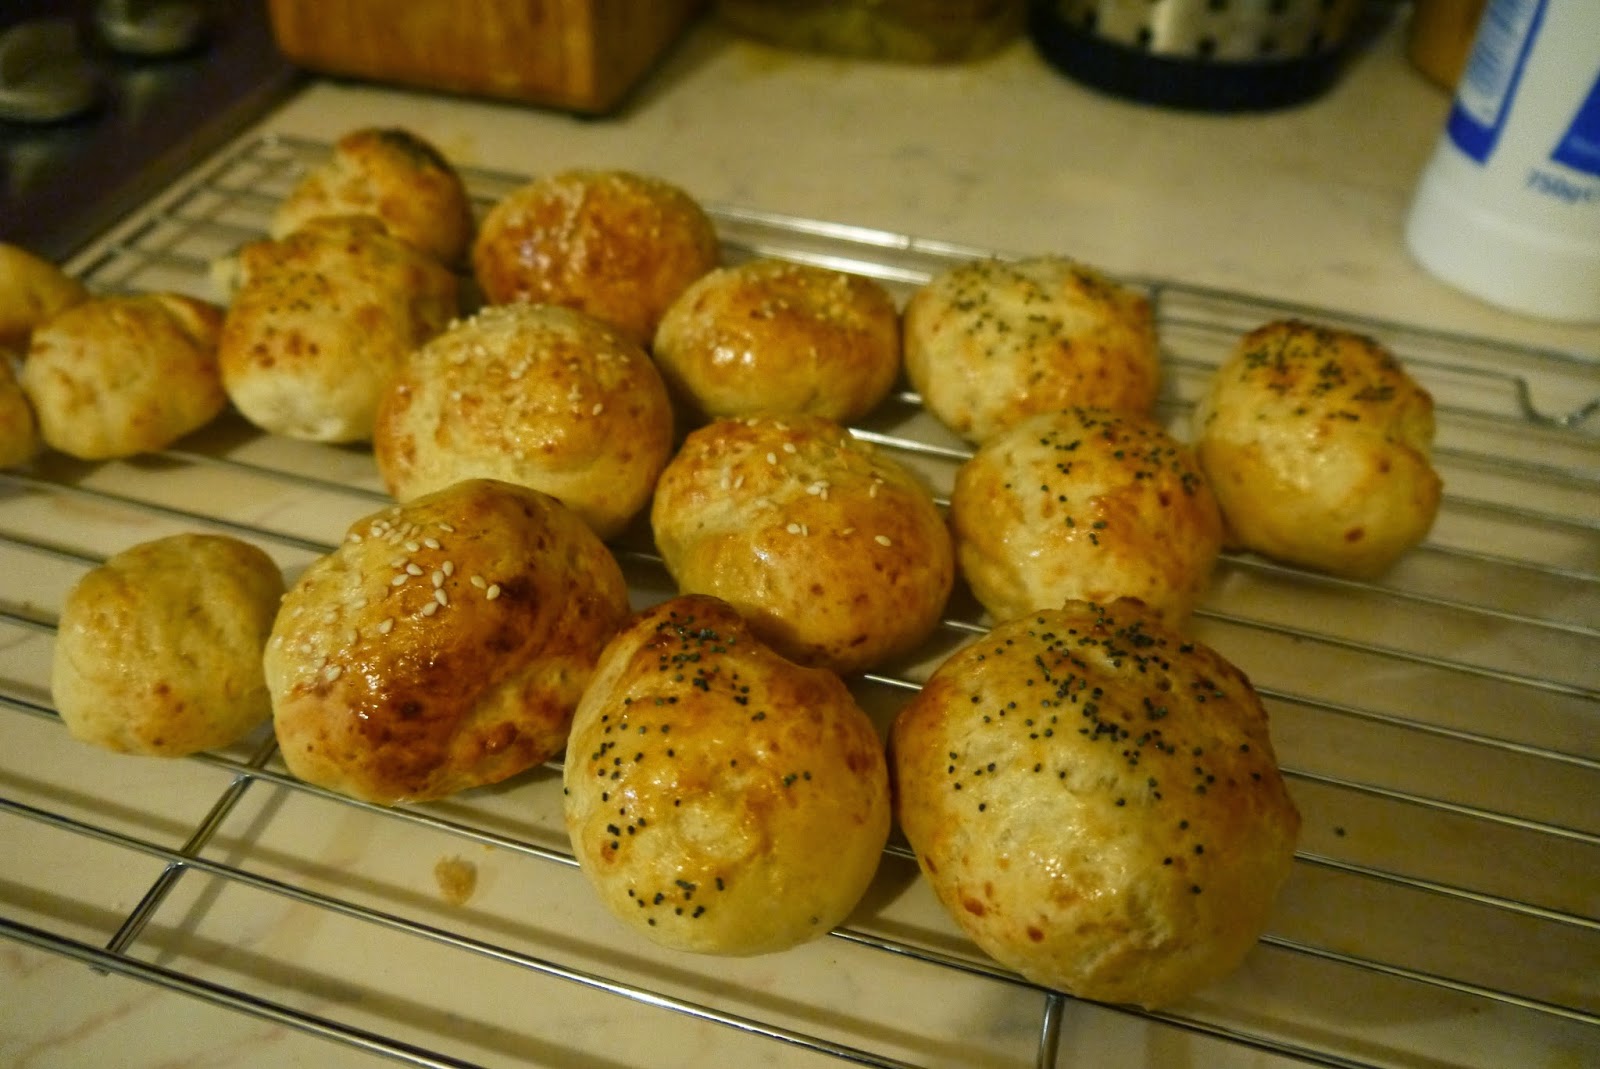
The end of term was coming for Elizabeth at Nursery. It suddenly occurred to me that I should probably sort out a gift for her teachers. I had a brief look at the suggested gifts in Tesco, they were mostly chocolates and mugs etc. For Christmas we made them gingerbread biscuits in the shape of Christmas trees and they had gone down well, so I thought we could bake them a gift again.

I asked Elizabeth what she thought we should do, and she suggested the Christmas tree gingerbread biscuits. So I asked her if there was a more summer appropriate theme. So we went through a few ideas like suns, or sunflowers and settled on strawberries!

I Googled some pictures of strawberries and drew my own templates:


I made Empire Biscuits this time, instead of the gingerbread biscuits.

Ingredients:
150g butter
50g sugar
200g self raising flour
Strawberry jam to sandwich in the middle of 2 biscuits
Icing sugar, water with lots and lots of red food colouring for the top of the biscuits
Chocolate sprinkles for the strawberry seeds
Green fondant icing for the stalk

Method:
Cream the butter and sugar together.
Add the flour and mix into a dough.
Flour the surface before rolling the dough out to about 3 or 4 mm thick.
Cut into shapes.
Cook in the oven for about 12 minutes at 160 degrees (fan) until a light golden brown colour.
Once cooled, assemble and decorate!


I made about 10 biscuits, there are so many helpers in the nursery that I was unsure how many people I was catering for. I wrapped them up in tissue paper and bought a nice box to present them in.
They were a big hit! Almost all of the other gifts had been boxes of chocolates and they were getting a bit fed up with them, so this was a nice change.
I think if I did them again I would make them smaller, they were a bit big.

Empire Biscuits are such easy and fun biscuits to make with children. I made these strawberry ones mostly by myself because they were a gift. But usually the girls get to roll out the dough and use whatever biscuit cutters they want to cut the biscuits out. Then they love spreading the jam and decorating the finished biscuits.