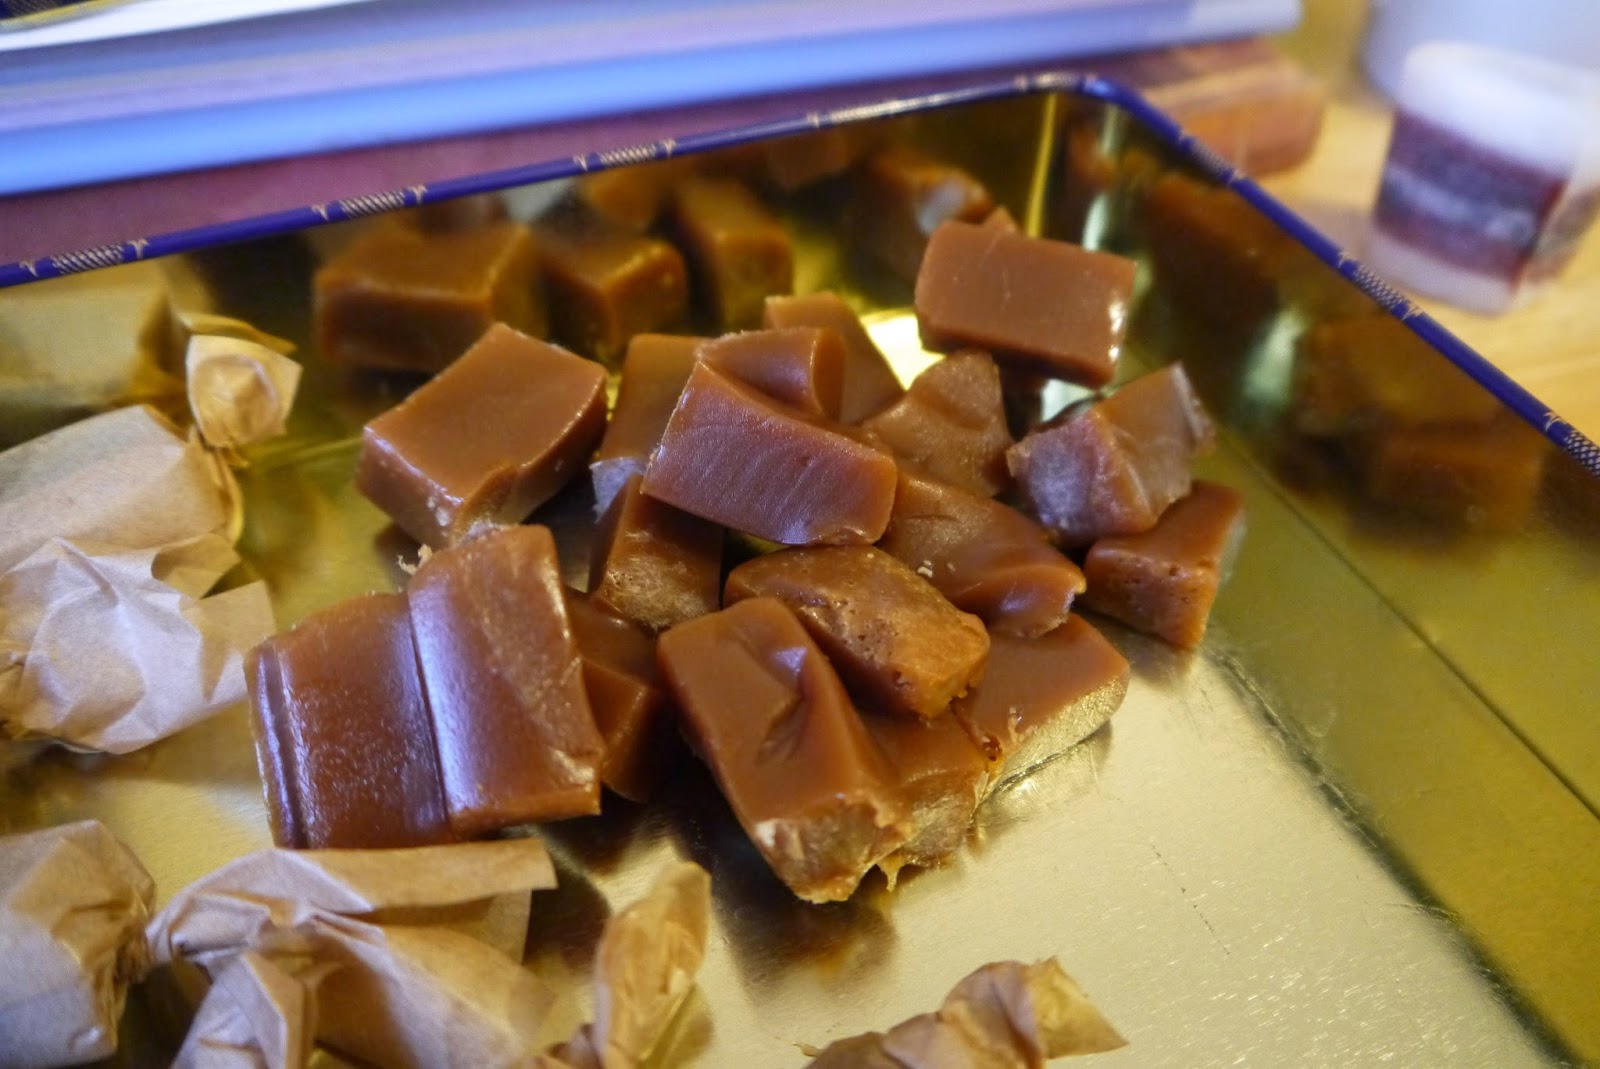
Showing posts with label snacks. Show all posts

Monday, 6 April 2015

Scottish Tablet

Scottish Tablet
This is a sugary treat! It's a harder form of fudge that crumbles in the mouth. I've made it a couple of times for my English friends and it is usually well received! It is incredibly tricky to make and mine often comes out like fudge. But it's still great to eat if it is soft.

Ingredients

  • 4oz salted butter
  • 1kg granulated sugar
  • 1 cup of full cream milk
  • 1 tin of condensed milk
Melt the butter in a heavy based pan. Add all of the rest of the ingredients and slowly bring to the boil, stirring frequently.
When it comes to the boil, turn the heat down and let it simmer for about 45 minutes until the mixture is a caramel brown colour.
Take it off the heat and beat it with an electric hand mixer until the mixture is really thick and coming away from the sides. This should take about 10 minutes. Have a taste of it, if it tastes grainy then it's right.
Pour it into a 20cm/30cm tin. Score it after 5 minutes. Then once it's hard cut it into squares.

I made these for the Easter Coffee Morning at Rebecca's Pre School. I took Rebecca into school especially for the end of term festivities, she doesn't usually go on a Friday. They had an Easter Egg Hunt, face painting, biscuit decorating, crispy cake making, crafts and loads more things going on.

This is all the food she came away with from one session:


Is it just me or is that a little bit too much for one 3 year old?

If you tried the tablet, let me know what you think. Leave a comment below.
Also, I'm always looking for new ideas for baking/cooking, if you have any suggestions, leave a comment!

Monday, 30 March 2015

Easy Sausage Rolls

Easy Sausage Rolls
When buying sausages for the family, I find that one pack is not really enough for the 4 of us and 2 packets are too many. So I decided to use up my left over sausages productively this week by making sausage rolls.

What you need:
  • Some sausages - I had 9 leftover chipolata sausages
  • A packet of ready made frozen puff pastry. Defrost and let it get to room temperature
  • 1 egg, beaten
Preheat the oven to 180 degrees
Roll out the pastry to about 40cm by 30cm.
Cut it into 3 long strips 3 x 40cm by 10cm
Take the skin off the sausages and lay them along the length of the pastry strips
Egg wash one side of the pastry strips and roll the pastry around the sausages
Cut them into small sausage roll sizes, so about an inch long
Put them into the fridge to let the pastry harden a little, about 20 minutes
I scored my pastry on the top, but that's more for decoration than anything else I think.
Egg wash all the exposed pastry
Cook in the oven for about 25 minutes, or until the pastry is golden brown

Elizabeth had these in her packed lunch the next day!

Friday, 31 October 2014

Quick and Easy Cupcakes

A quick and easy cupcake recipe. It's the sort of thing I always have the ingredients for if the girls want to do baking. This one was passed on to me, but I believe that it is Nigella's recipe:


Cake ingredients

  • 125g unsalted butter
  • 125g caster sugar
  • 2 eggs
  • 125g SR flour
  • 1/2 tsp vanilla extract
  • 2-3 tbsp milk


Method

  • Preheat oven to 180 degrees (fan).
  • Blitz all the ingredients until smooth, except the milk, with electric mixer or in a food processor.
  • Add milk slowly until the mixture is a soft droopy consistency.
  • Spoon into cupcake cases until they are a third full.
  • Cook till risen, golden, bouncy and if you put a skewer in it comes out clean. (about 15 minutes)


Butter cream icing

  • 150g icing sugar
  • 75g creamed butter
  • A little vanilla extract
  • A little milk if it's too firm


Method

  • Blitz all ingredients together with your food mixer until it's smooth.
  • Add colouring if you like.
  • Spread over your cakes.
  • Add toppings etc.

Friday, 24 October 2014

Fudge Slices - Traybake

When I was about 17 my after school job was looking after two early teenage girls. I would go to their house everyday after school until either their mum or step dad got home.

My little sister, Janis would also come to their house so that I could look after her too when my mum was working.

On Wednesdays we had half days at school, finishing before lunch. I got into the habit of buying Janis and I some lunch from a deli that was up the road from my school. We would have a roll each and a fudge slice. Their fudge slices were lovely. I don't think I had ever had them before and I don't really remember seeing them since until I was working in a school in Aberdeenshire.

At Mintlaw Academy, Aberdeenshire, the Business Studies classes would have to come up with an Enterprise Initiative every year. One year they came up with the idea of creating and publishing a recipe book. They invited all the members of staff to contribute a favourite recipe or two. I was very much into savoury cooking then, and  I added a Chinese recipe that I loved.

What was great about the book was that the recipes were tried and tested by home cooks. A lot of the recipes were family favourites, probably passed down from previous generations. Included amongst them was a recipe for fudge slices.

It had probably been 15 years since I had a fudge slice from the Deli in Currie, just up the road from the High School. But I thought these ones were a pretty good likeness. Regardless of whether or not they were the same, they were bloody delicious!

I've made this recipe A LOT, my mum now makes it and I've passed it on to Janis and my sister in law. I don't know anyone who doesn't like these. Elizabeth and Rebecca got one in her their lunches this week, and Jeff took some in to his work for his birthday.


I've made my own tweaks to get them just right.

Ingredients

  • 4oz soft margarine
  • 2tbsp sugar
  • 2tbsp golden syrup
  • 1 small tin of condensed milk
  • 9oz biscuits blitzed in the food processor
  • 1 pack of milk chocolate, melted to spread on top


Method

  • Melt the marg, sugar, golden syrup and condensed milk in a pan over a low heat.
  • Bring it to a gentle boil.
  • Let it boil for at least 5 minutes, until the colour has darkened to a caramel colour.
  • Take it off the heat and beat it with the electric beaters until it has thickened - when it's coming away from the sides of the pan. This will probably take about 5 minutes.
  • Add in the biscuits and mix well. The mixture should all come together like a dough.
  • Press and spread the mixture into a baking tray. I use a 30cm/20cm deep tray. I also line it in advance with clingfilm so that the edges are nice and smooth and it's easy to lift out of the tray to chop up when it's set.
  • Spread the melted chocolate evenly over the top.
  • Put it in the fridge to set.
  • Cut it into squares or rectangles, whatever takes your fancy. Small might be best because they are very morish!

Friday, 10 October 2014

Food from the Magic Faraway Tree, Toffee Shocks

I've been trying to think of new ideas for the blog. And one idea was to do something with a book theme.

I read The Faraway Tree books (Enid Blyton) to the girls (well, mainly Elizabeth) a while back and they went down well. I think the repetitive nature of the books is great for younger children, it almost feels like a book of short stories, one for each land at the top of the tree! Elizabeth got to know the characters really quickly even if she didn't always remember what had happened last time in the story.

So I'm going to try to reproduce some of the food that is described in the books.

Elizabeth picked the Toffee Shocks to do first.

"Jo... munched a peculiar piece of toffee which seemed to get bigger in his mouth instead of smaller... Jo's toffee was now so big that he couldn't say a word. Then it suddenly exploded in his mouth, went to nothing, and left him feeling most astonished."

Well, as far as I know it's not possible to make toffees that get bigger and then explode into nothing, but I did decide to experiment with toffee and popping candy.

I followed this recipe for making the toffee. To be honest, it covers Bessie's homemade toffee description. It is the "best, sweetest, chewiest toffee" on it's own.

The problem with popping candy is that it's not so effective once it's been exposed to humidity and moisture. So I tried a few things.
  • a corner of popping candy at the bottom of the baking tray, so the toffee covered it
  • pressing the popping candy on the top of the set toffee
  • squishing some toffee flat then putting the popping candy on top, and rolling it up so that the candy is in the middle of the toffee
The last method seemed to be the best one. Although the candy doesn't pop as well as it would, I think that it gives a degree of *shock* to the toffees. Plus it wasn't an unpleasant texture in the toffee and it added a variety of flavour to the toffees.


My first attempt at making a 3D tree. This is something I will develop for the girls to do themselves, with a template. Next time I will use cardboard instead of paper!


The toffee shocks were the ones wrapped in baking paper. The unwrapped ones are the *Bessie* versions mentioned above.

Coming soon, Pop Biscuits and Google Buns.

I would love some comments, suggestions or ideas. Or just say hello to let me know you've been reading.

Friday, 3 October 2014

Minnie's Empire

Elizabeth suggested making some Minnie Mouse biscuits to take to the childminder's house for their snack.


I made them the same way as I made the Strawberry Empires, using melted chocolate for the ears and face.

I have some black fondant icing and I know they would have looked better if I had used that instead of the chocolate, but I want the biscuits to taste nice, and I think too much fondant icing is just too sweet. Plus I know chocolate and plain icing go really well with this biscuit.

Friday, 22 August 2014

Strawberry Empires

The end of term was coming for Elizabeth at Nursery. It suddenly occurred to me that I should probably sort out a gift for her teachers. I had a brief look at the suggested gifts in Tesco, they were mostly chocolates and mugs etc. For Christmas we made them gingerbread biscuits in the shape of Christmas trees and they had gone down well, so I thought we could bake them a gift again.

I asked Elizabeth what she thought we should do, and she suggested the Christmas tree gingerbread biscuits. So I asked her if there was a more summer appropriate theme. So we went through a few ideas like suns, or sunflowers and settled on strawberries!

I Googled some pictures of strawberries and drew my own templates:


I made Empire Biscuits this time, instead of the gingerbread biscuits.

Ingredients:
150g butter
50g sugar
200g self raising flour
Strawberry jam to sandwich in the middle of 2 biscuits
Icing sugar, water with lots and lots of red food colouring for the top of the biscuits
Chocolate sprinkles for the strawberry seeds
Green fondant icing for the stalk

Method:
Cream the butter and sugar together.
Add the flour and mix into a dough.
Flour the surface before rolling the dough out to about 3 or 4 mm thick.
Cut into shapes.
Cook in the oven for about 12 minutes at 160 degrees (fan) until a light golden brown colour.
Once cooled, assemble and decorate!


I made about 10 biscuits, there are so many helpers in the nursery that I was unsure how many people I was catering for. I wrapped them up in tissue paper and bought a nice box to present them in.
They were a big hit! Almost all of the other gifts had been boxes of chocolates and they were getting a bit fed up with them, so this was a nice change.
I think if I did them again I would make them smaller, they were a bit big.

Empire Biscuits are such easy and fun biscuits to make with children. I made these strawberry ones mostly by myself because they were a gift. But usually the girls get to roll out the dough and use whatever biscuit cutters they want to cut the biscuits out. Then they love spreading the jam and decorating the finished biscuits.